Category: Blog

Your blog category

  • How To Set Up Automated Workflows With Python

    How To Set Up Automated Workflows With Python

    Imagine sitting down at your desk on a Monday morning, opening your laptop, and realizing that all the tedious, repetitive tasks you hated doing on Friday afternoon have already been finished. No manual data entry, no downloading CSVs from emails, and no renaming hundreds of files. This isn’t a fantasy; it is simply what happens when you stop acting like a human router and start using Python to handle the heavy lifting.

    Automated Research Workflows for Accelerated Discovery (eBook)

    Automation is often painted as something reserved for high-level engineers building complex neural networks. In reality, most useful automation involves simple scripts that connect two or more existing tools. If you can write a basic loop and call an API, you can reclaim hours of your week. This guide will walk you through the practical steps of building these systems from the ground and managing them so they run while you sleep.

    Identify your candidates for automation

    Before you write a single line of code, you need to find the right targets. Not every task deserves a script. If a task takes you five minutes once a month, the time spent debugging a Python script might actually cost you more than just doing the task manually. You are looking for tasks that meet the “Three Rs”: Repetitive, Rule-based, and Relentless.

    Look for workflows that involve:

    • Moving data between spreadsheets or databases.
    • Scraping information from websites to track prices or news.
    • Renaming, sorting, or compressing large batches of files.
    • Sending notifications based on specific triggers (like an email alert when a stock hits a certain price).

    Start small. Your first goal shouldn’t be to automate your entire department. Instead, try to automate one single, annoying task, like downloading a daily report. Once that works reliably, you can start chaining scripts together to create a full workflow.

    The essential toolkit for Python automation

    Python has a massive library ecosystem, which means you rarely have to write complex logic from scratch. Depending on what you want to automate, you will likely rely on a few specific libraries.

    Interacting with web data

    If your workflow involves the internet, requests is your best friend. It allows you to send HTTP requests to APIs or websites to retrieve data. If the data you need isn’t available via an API and you have to scrape a webpage, BeautifulSoup or Selenium are the industry standards. Selenium is particularly useful when you need to interact with buttons, forms, or JavaScript-heavy sites that behave like a real browser.

    Handling files and spreadsheets

    Most business automation revolves around Excel or CSV files. The pandas library is the gold standard here. It allows you to manipulate massive datasets with just a few lines of code, performing operations like filtering, merging, and aggregating data that would take hours in a standard spreadsheet. For simpler tasks like moving files around your operating system, the built-in os and shutil modules are all you need.

    Connecting to databases and APIs

    To make a workflow truly automated, it needs to talk to other services. Whether you are pushing data to a PostgreSQL database using psycopg2 or sending a message to a Slack channel via a webhook, knowing how to handle JSON and authentication is critical. Most modern tools offer REST APIs, which are incredibly easy to interact with using Python.

    Building your first automated pipeline

    A workflow is essentially a pipeline: Input $\rightarrow$ Transformation $\rightarrow$ Output. To build one, you should follow a structured approach to avoid creating “spaghetti code” that breaks the moment a website changes its layout.

    1. Define the trigger: Decide what starts the process. Is it a specific time of day? Is it a new file appearing in a folder? Or is it an incoming email?
    2. 맹2. Extract the data: Write the code to fetch your raw material. This might be an API call, a database query, or a web scrape.

    3. Process the information: This is where your logic lives. Clean the data, calculate totals, or format the text.
    4. Load the result: Send the processed data to its final destination, such as an updated Google Sheet, a database, or a PDF report.

    Keep your logic modular. Instead of writing one giant script, write small functions that do one thing well. This makes it much easier to test each part of your pipeline individually. If your data extraction fails, you’ll know exactly where the break occurred without having to hunt through 500 lines of code.

    Scheduling your scripts to run autonomously

    A script sitting on your desktop isn’t an automated workflow; it’s just a tool waiting to be used. To achieve true automation, you need a way to trigger your code without manual intervention. This is where task schedulers come in.

    If you are working on a local machine, you can use Cron on macOS/Linux or Task Scheduler on Windows. These tools allow you to tell your computer, “Run this Python script every morning at 8:00 AM.” It is simple, reliable, and requires no extra infrastructure.

    For more professional or scalable setups, consider cloud-based options:

    • GitHub Actions: Great for workflows that involve code or data stored in repositories.
    • AWS Lambda: A “serverless” approach where your code only runs when triggered by an event, like a file upload to an S3 bucket.
    • Google Cloud Functions: Similar to AWS, perfect if your workflow is already integrated with Google Workspace.

    The goal is to move your script from your personal computer to a place where it can run 24/7 without you needing to keep your laptop open.

    Handling errors and maintaining stability

    The biggest mistake beginners make is assuming everything will always work. APIs go down, internet connections flicker, and file formats change. If your script doesn’t have error handling, it will simply crash, and you won’t know the task failed until you realize a report is missing.

    Use try-except blocks to catch common errors. For example, if a network request fails, you can program the script to wait for 60 seconds and try again rather than just quitting. Additionally, implement a logging system. Instead of using print statements, use Python’s logging module to write errors to a file. This way, you can check the logs at the end of the week to see if any silent failures occurred.

    Setting up automated alerts is the final piece of the puzzle. Use a simple script to send yourself a notification via Telegram, Slack, or email whenever a critical error is caught. This transforms your automation from a “black box” into a reliable system you can trust.

    Ready to stop doing the busy work? Pick one repetitive task today and start mapping out the logic. You don’t need to be a software engineer to start building; you just need to be willing to experiment.

    Our Top Picks

    Products we recommend:

    1. Automated Research Workflows for Accelerated Discovery (eBook)

    Automated Research Workflows for Accelerated Discovery (eBook)

    Automated Research Workflows for Accelerated Discovery (eBook)

    by VitalSource

    $16.00

    Check Price →

    2. How To Promenade With A Python (and Not Get Eaten)
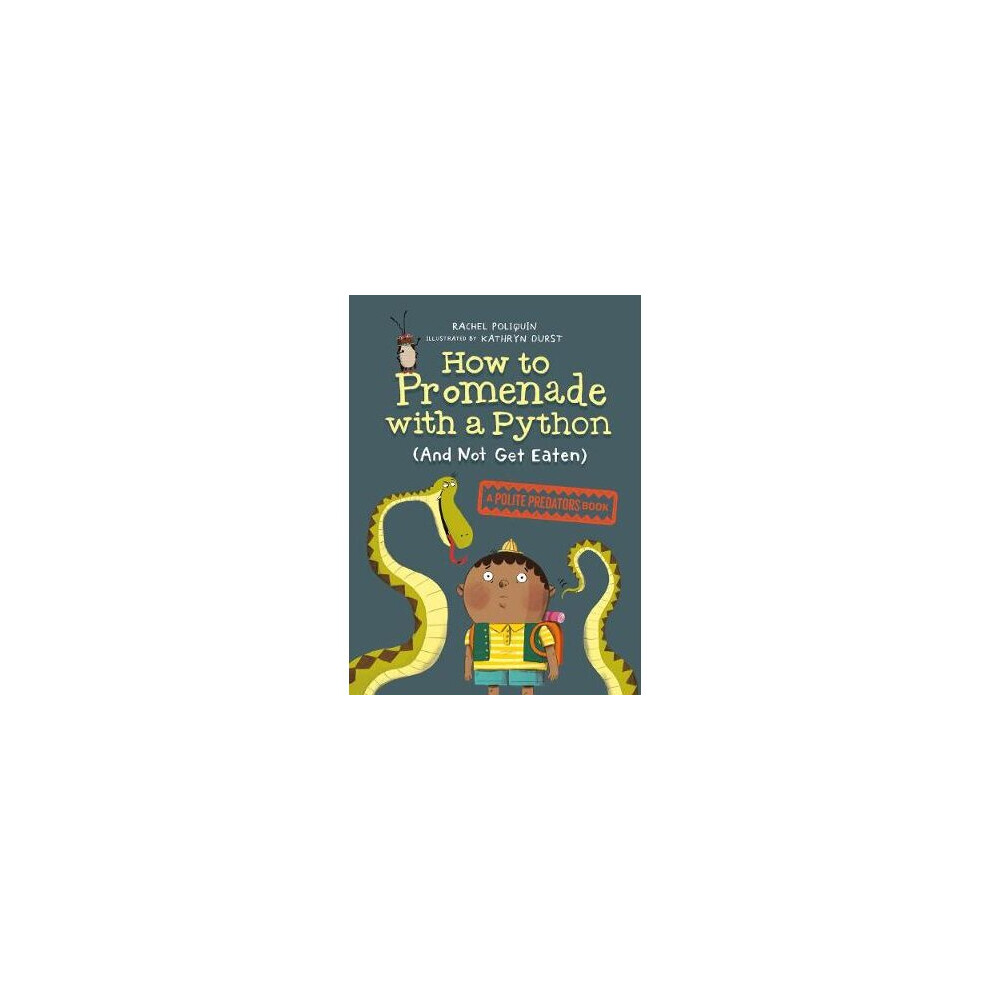
    How To Promenade With A Python (and Not Get Eaten)

    How To Promenade With A Python (and Not Get Eaten)

    by OnBuy.com

    $10.90

    Check Price →

    3. How to Set Up Information Systems

    How to Set Up Information Systems

    How to Set Up Information Systems

    by Knetbooks.com

    $77.48

    Check Price →

  • Diy Learning Games Parents Can Make At Home

    Diy Learning Games Parents Can Make At Home

    We have all been there: it is a rainy Tuesday afternoon, the kids are restless, and you can practically feel the chaos brewing. You want to do something productive, but the thought of setting up a complex craft project or running to the store for expensive new toys feels exhausting. The good news is that some of the most effective teaching tools are already sitting in your kitchen pantry or recycling bin.

    Learning Games

    Creating your own activities doesn’t require a teaching degree or a massive budget. In fact, some of the most educational moments happen when children are playing with simple, tactile objects. These DIY games help develop fine motor skills, problem-solving abilities, and even early literacy, all while keeping your spending low. Let’s look at some practical, easy-to-make ideas you can whip up in minutes.

    Games for Tiny Explorers (Ages 1-3)

    Toddlers learn primarily through their senses. They need to touch, squish, and move things to understand how the world works. At this age, the goal is sensory stimulation and hand-eye coordination.

    The Sensory Bin Adventure

    This is a classic for a reason. Grab a large plastic tub or even a sturdy cardboard box and fill it with a base material. You can use dried rice, uncooked pasta, or even oatmeal if you want something even more budget friendly. Hide small objects like plastic animals, large buttons, or colorful scoops inside.

    • Developmental Benefit: Enhances tactile processing and fine motor strength.
    • Safety Note: Always supervise closely. Ensure all items are much larger than a toilet paper roll to prevent choking hazards.

    Color Sorting Station

    Grab some empty egg cartons and a handful of colorful items like pom-poms, large beads, or even colored scraps of felt. Paint the bottom of each egg carton cup a different color. Your toddler’s job is to match the item to the corresponding colored cup.

    This activity is best for toddlers who are just beginning to recognize patterns and differentiate between hues. It is simple, quiet, and incredibly engaging for little hands.

    Creative Play for Preschoolers (Ages 3-5)

    Preschool-aged children are starting to understand more complex concepts like counting, letters, and sorting by attribute. They love a bit of a challenge and enjoy games that feel like “work” disguised as play.

    Alphabet Scavenger Hunt

    Write letters of the alphabet on small pieces of paper or sticky notes and hide them around a room. Give your child a basket and ask them to find specific letters. To make it harder, ask them to find a letter and then find an object in the house that starts with that same letter.

    This builds phonemic awareness and keeps them moving. It turns a sedentary learning task into an active physical hunt.

    DIY Number Matching

    You can make this using paper plates and some clothespins. Write numbers 1 through 10 on the edge of the plates. On the clothespins, draw corresponding dots (e.g., three dots on one pin, five on another). Your child must clip the correct number of pins onto each plate.

    Using clothespins is a fantastic way to strengthen the “pincer grasp,” which is the same muscle movement they will eventually need for holding a pencil correctly.

    Engaging Older Kids (Ages 6-8)

    Once children enter school age, they are ready for logic, strategy, and more advanced math. The games can become a bit more complex, involving rules and competition.

    The Measurement Olympics

    Gather various household items: a spoon, a book, a shoe, a toy car, and a remote control. Provide your child with a ruler or a tape measure. Create a “scorecard” where they have to predict the length of each item before measuring it. The goal is to get as close to their prediction as possible.

    This introduces the concept of estimation and teaches them how to use measuring tools accurately. It is a great way to make math feel less like a chore and more like a challenge.

    Story Stones

    Find some smooth stones from the backyard or a park. Use permanent markers to draw simple icons on them—a sun, a dog, a house, a boat, a person, etc. Put all the stones in a bag. Your child pulls out three stones and has to invent a short story that connects all three images.

    This is an incredible tool for developing narrative skills, vocabulary, and creative thinking. It is also a wonderful way to encourage oral language development.

    Tips for Success with DIY Learning

    While the goal is education, the priority should always be fun. If a child becomes frustrated with a game, it is okay to simplify the rules or move on to something else. Here are a few pointers to keep things running smoothly:

    1. Rotate your materials. If you leave the sensory bin out every single day, it loses its novelty. Put it away for a week and bring it back later to make it feel “new” again.
    2. Follow their lead. If they decide the alphabet hunt is actually a game about “hunting for treasure,” go with it. The engagement is what matters most.
    3. Keep it simple. You don’t need a huge setup. The best games are often the ones that require the least amount of cleanup.

    Learning doesn’t have to happen at a desk with a workbook. By using what you already have at home, you can create a rich, stimulating environment that fosters a lifelong love of discovery. Next time you see a pile of recycling or an empty egg carton, look at it through a child’s eyes—you might just find your next favorite activity.

    Want more practical parenting tips? Sign up for our weekly newsletter to receive fresh, easy activity ideas delivered straight to your inbox every Monday!

    Our Top Picks

    Products we recommend:

    1. Wrapped – Crêpes, wraps and rolls you can make at home

    Wrapped - Crêpes, wraps and rolls you can make at home

    Wrapped – Crêpes, wraps and rolls you can make at home

    by OnBuy.com

    $18.08

    Check Price →

    2. Learning At Home Colours

    Learning At Home Colours

    Learning At Home Colours

    by Allegro.pl

    $6.51

    Check Price →

    3. Learning English at Home

    Learning English at Home

    Learning English at Home

    by Indigo Books & Music

    $100.95

    Check Price →

  • Diy Learning Games Parents Can Make At Home

    Diy Learning Games Parents Can Make At Home

    We have all been there. It is a rainy Tuesday afternoon, the tablets are starting to feel like a bit too much screen time, and the kids are beginning to bounce off the walls. You want to do something productive, something that feels more like a fun activity than a classroom lesson, but your toy box is looking a little thin on new ideas. The good news is that you don’t need to spend a fortune at a specialty toy store to keep those curious minds engaged.

    Learning Games

    Some of the most effective learning tools are actually sitting right in your kitchen pantry or recycling bin. Making your own games allows you to tailor the difficulty to exactly where your child is at, ensuring they stay challenged without getting frustrated. Whether you are looking for indoor vs outdoor activities to shake up the routine, these DIY projects are easy to whip up with basic household items.

    Games for Toddlers and Preschoolers (Ages 2-4)

    At this age, learning is all about sensory input and fine motor skills. They are discovering textures, shapes, and the concept of sorting. These games focus on building those foundational brain connections through simple, tactile play.

    The Sensory Color Sort

    Gather a handful of colorful items from around the house—think bright LEGO bricks, colored pom-soms, or even different colored pieces of fruit. Grab a muffin tin or some colored paper plates to act as “stations.”

    • How to play: Ask your toddler to place the red items in the red bowl and the blue items in the blue bowl.
    • Developmental benefit: This builds visual discrimination and color recognition.
    • Safety note: Always supervise closely with small items to prevent choking hazards.

    Sticky Note Scavenger Hunt

    This is a great way to get some energy out when you are stuck inside. Grab a pack of multi-colored sticky notes and write simple shapes or letters on them.

    Hide the notes around the living room at eye level for your child. As they find each one, have them identify the color or the letter. It turns a simple search into an educational adventure that keeps them moving.

    Games for Kindergarten and Early Elementary (Ages 5-7)

    Once kids start school, their cognitive abilities expand into literacy and basic math. They are ready for rules, counting, and more complex patterns. These games bridge the gap between play and formal schooling.

    DIY Alphabet Soup

    If you have some leftover plastic alphabet magnets or even just small pieces of cardboard with letters written on them, you can create a sensory bin. Fill a large bowl with dried rice, beans, or even water beads.

    Hide the letters inside the “soup.” Your child has to “fish” them out and then try to spell their name or simple three-letter words like “cat” or “sun.” It is a wonderful way to practice spelling without the pressure of a worksheet.

    Number Line Jump

    If you have some painter’s tape, you can turn your hallway into a giant number line. Tape strips of paper with numbers 1 through 20 on the floor in a straight line.

    Call out a number and have them jump to it. To make it harder, call out “two steps forward from 5” to introduce basic addition. This is a perfect example of an age appropriate way to introduce math concepts through physical movement.

    Games for Older Elementary Kids (Ages 8-10)

    Older kids need more complexity to stay interested. They enjoy strategy, competition, and solving puzzles. At this stage, you can introduce logic and more advanced arithmetic.

    The Homemade Escape Room

    This requires a bit more prep, but the payoff is huge. Create a series of “locks” using simple math problems or riddles. You can use a real small padlock on a box or just a “paper lock” where they have to write the correct code to move to the next clue.

    For example, the clue could be: “The code is the answer to 12 x 4 minus 8.” This encourages critical thinking and persistence.

    Cardboard Geometry Construction

    Collect some old cereal boxes and some masking tape. Cut the cardboard into various triangles, squares, and rectangles. Challenge your child to build a 3D structure, like a pyramid or a cube, using only these flat shapes.

    This introduces the concept of spatial reasoning and geometry in a hands-on way. It is much more memorable than looking at a diagram in a textbook.

    Quick Tips for Success

    While making these games, keep a few things in mind to ensure the experience stays positive for both you and your child:

    1. Keep it short: If you see them losing interest, wrap it up. It is better to end on a high note than to force a lesson.
    2. Rotate your toys: Don’t bring out all your DIY games at once. Introducing one new thing every week keeps the novelty alive.
    3. Focus on the process: The goal isn’t to get every answer right; it’s to foster a love for learning and problem-solving.

    Creating your own learning activities doesn’t require a degree in education or a massive budget. It just requires a little bit of creativity and some of the stuff you already have in your cupboards. Next time you find yourself with a free afternoon and a restless kid, skip the extra trips to the store and try one of these instead.

    Want more hands-on activity ideas? Sign up for our weekly newsletter to get fresh, budget-friendly DIY projects delivered straight to your inbox every Monday!

    Our Top Picks

    Products we recommend:

    1. Wrapped – Crêpes, wraps and rolls you can make at home

    Wrapped - Crêpes, wraps and rolls you can make at home

    Wrapped – Crêpes, wraps and rolls you can make at home

    by OnBuy.com

    $18.08

    Check Price →

    2. Learning At Home Colours

    Learning At Home Colours

    Learning At Home Colours

    by Allegro.pl

    $6.51

    Check Price →

    3. Learning English at Home

    Learning English at Home

    Learning English at Home

    by Indigo Books & Music

    $100.95

    Check Price →

  • Best Niches For Kdp Puzzle Books In 2026

    Best Niches For Kdp Puzzle Books In 2026

    If you’ve been hanging around the KDP community for any length of time, you know the old advice: “Just make a Sudoku book and hope for the best.” We both know that doesn’t work anymore. The Amazon marketplace is way too crowded for generic content to survive. As we look toward 2026, the strategy has shifted from volume to precision. You can’t just throw puzzles at a wall; you need to find specific pockets of people looking for very particular types of mental stimulation.

    Halloween Coloring Book Kdp Niches by Elimesherstudio | Creative Market

    Finding a profitable corner of the Kindle Direct Publishing market requires a mix of trend forecasting and data analysis. You aren’t just looking for “puzzles”; you are looking for “word searches for retired nurses” or “logic puzzles for ADHD adults.” The more specific you get, the less you have to fight against the massive publishing giants. Let’s break down where the real opportunities are hiding for the coming year.

    The Rise of Hyper-Niche Demographics

    The biggest mistake most creators make is targeting “everyone.” When you target everyone, you target nobody. In 2026, the money is in demographic-specific books. People want to see themselves reflected in the content they buy. This means moving away from generic themes and moving toward hobby-based or life-stage-based puzzles.

    Senior Cognitive Care

    The aging population is a massive, underserved market. Families are constantly searching for “brain games” to help elderly relatives maintain cognitive function. Instead of a standard word search, think about “Large Print Memory Boosters” or “Nostalgic 1950s Word Scrambles.” These books have a high retention rate because they serve a functional purpose rather than just being a way to pass the time.

    Neurodivergent-Friendly Brain Breaks

    There is a growing demand for puzzles designed specifically for neurodivergent minds. This includes books that offer high dopamine rewards, such as “Quick-Win Logic Puzzles” or “Visual Pattern Recognition Games.” These aren’t about difficulty for the sake of difficulty; they are about engagement and sensory satisfaction. If you can design layouts that aren’t visually overwhelming, you’ll find a very loyal customer base.

    High-Margin Hobbyist Puzzles

    Another way to find success is to piggyback on existing, passionate communities. People who spend hundreds of dollars on gardening tools or knitting supplies are the same people who will spend $9.99 on a themed puzzle book. These niches have a built-sake built-in audience.

    • The Urban Gardening Crowd: Think botanical crosswords or succulent-themed word searches.
    • Retro Gaming Enthusiasts: Logic puzzles themed around 8-bit aesthetics or classic arcade mechanics.
    • True Crime Obsessives: Cryptograms that use crime scene terminology or mystery-solving logic grids.

    When you target a hobby, your marketing becomes much easier. You aren’t trying to convince someone to like puzzles; you are simply providing a way for them to enjoy their existing hobby in a new format.

    The Economics of KDP Puzzle Publishing

    Before you dive headfirst into designing, you need to look at the numbers. You shouldn’t start this as a hobby; you should start it as a business. This means understanding your potential ROI and managing your overhead.

    What is the startup cost?

    The beauty of KDP is that you don’t need a printing press. Your primary expenses are software and research tools. If you are smart, you can keep your initial startup cost under $100. You’ll need a subscription to a tool like Helium 10 or Publisher Rocket to find low-competition keywords, and perhaps a Canva Pro subscription for high-quality interior design. If you use specialized puzzle generators like Puzzle Wiz, add another monthly fee to your budget.

    How much can you earn?

    This is the question everyone asks. If you are asking how much can you earn, the answer is entirely dependent on your catalog size and niche selection. A single “hit” book in a well-chosen niche can bring in $200 to $500 in monthly royalties. However, most successful publishers aim for a “long tail” strategy. A portfolio of 50 niche books, each earning $50 a month, results in a $2,500 monthly side income. It is a game of accumulation, not a lottery.

    Time Investment and Workflow

    Don’t expect to make a masterpiece overnight. A single high-quality, themed puzzle book can take anywhere between 10 to 30 hours to research, create, format, and upload. This includes the time spent verifying that your puzzle solutions are actually correct—nothing kills a brand faster than a book with errors.

    Tools to Build Your Publishing Empire

    You don’t need to be a mathematician to create great puzzles. There are plenty of resources to help you automate the heavy lifting.

    1. Research: Use Amazon’s search bar (incognito mode) and tools like Helium 10 to see what people are actually typing into the search box.
    2. Hall of Fame: Canva for covers and aesthetic interior elements.

    3. Generation: Software like Book Bolt or Puzzle Publishers can automate the creation of the actual grids.
    4. Quality Control: Always print a physical proof of your book via KDP before you consider it “finished.”

    The landscape of 2026 will reward those who focus on the “micro-niche.” Stop trying to beat the giants at the Sudoku game. Instead, find the small, passionate groups of people who are waiting for a book that speaks their specific language. If you can provide that connection, the royalties will follow.

    Ready to start your publishing journey? Pick one hobby you are interested in, research the competition on Amazon, and see if there is a gap you can fill. The best time to start was yesterday; the second best time is right now.

    Our Top Picks

    Products we recommend:

    1. 3000 Best Kdp Coloring Book Niches by Elimesherstudio | Creative Market

    3000 Best Kdp Coloring Book Niches by Elimesherstudio | Creative Market

    3000 Best Kdp Coloring Book Niches by Elimesherstudio | Creative Market

    by Creative Market

    $11.00

    Check Price →

    2. Best Books for Teens

    Best Books for Teens

    Best Books for Teens

    by Knetbooks.com

    $155.93

    Check Price →

    3. Best Books for Teens

    Best Books for Teens

    Best Books for Teens

    by BiggerBooks.com

    $162.23

    Check Price →

  • How Mazes Improve Problem-Solving Skills In Children

    How Mazes Improve Problem-Solving Skills In Children

    Ever watched your child get completely lost in a paper maze, brow furrowed, tongue poking out the corner of their mouth, only to let out a huge cheer when they finally find the exit? It looks like simple play, but there is actually a lot of heavy lifting happening inside their brain during those moments. While it might seem like just a way to pass a rainy afternoon, mazes are actually tiny, contained laboratories for logic.

    TEACHING CHILDREN TO LOVE PROBLEM SOLVING (eBook)

    As parents, we are always looking for ways to support development without making everything feel like a chore. The great thing about mazes is that they don’t feel like “work.” They are an educational tool disguised as a game, helping kids practice critical thinking without the pressure of a formal classroom setting.

    The cognitive mechanics behind the fun

    When a child navigates a maze, they aren’t just moving a pencil or a finger from point A to point B. They are engaging in a complex sequence of mental operations. First, they have to scan the environment to identify paths. Then, they have to predict where a path might lead and, more importantly, recognize when a path hits a dead end.

    This process builds several key cognitive muscles:

    • Spatial Awareness: They are learning to understand distances, boundaries, and the relationship between objects in a space.
    • Working Memory: To solve a complex maze, a child has to remember which paths they have already tried so they don’t repeat the same mistakes.
    • Visual Discrimination: They are training their eyes to pick out fine details, such as small openings or subtle turns, which is a precursor to reading skills.
    • Planning and Execution: They are essentially practicing “if-then” logic. “If I turn left here, then I will hit that wall, so I should try right instead.”

    Building resilience through trial and error

    One of the most underrated benefits of mazes is how they teach kids to handle failure. In a world that often prioritizes instant gratification, a maze offers a much-needed lesson in persistence. When a child hits a dead end, they face a choice: give up or backtrack.

    Learning to view a dead end not as a “failure” but as a “piece of information” is a massive developmental milestone. It teaches them that mistakes are simply part of the process of finding the right answer. This builds a sense of grit and determination that stays with them long after they’ve put the crayon down.

    Developing fine motor control

    For younger children, the physical act of navigating a maze is just as important as the mental aspect. Using a pencil to trace a narrow path requires precise hand-eye coordination. This strengthens the small muscles in the hands and improves grip, which is essential for learning to write legibly later on.

    Tailoring the experience to different ages

    Not all mazes are created equal. To keep your child engaged and prevent frustration, you should match the difficulty level to their current developmental stage.

    Toddlers and Preschoolers

    For the little ones, focus on simplicity. The best for toddlers are wide-path mazes with very few turns. You can even use physical objects to create a maze on the floor using pillows or painter’s tape. At this age, the goal is simply recognizing the concept of a path and an exit.

    School-Aged Children

    Once they have mastered the basics, you can introduce more complexity. Paper-based mazes with branching paths and “traps” are great for this age. You can also introduce 3D elements, like marble runs, which add a layer of physical interaction to the logic puzzle.

    Older Kids and Pre-teens

    For older children, the challenge should move toward logic and strategy. Complex, multi-layered mazes or digital logic puzzles can keep them interested. At this stage, you can encourage them to find the “most efficient” route, which introduces the concept of optimization and strategic thinking.

    Indoor vs outdoor: Changing the scenery

    While paper mazes are perfect for a quiet afternoon at the kitchen table, don’t forget that you can take this activity outside. Comparing indoor vs outdoor maze play can actually provide different developmental benefits.

    Indoor mazes are controlled, quiet, and great for deep focus and fine motor skills. Outdoor mazes—like a garden hedge maze or even a “human maze” made of cones in the backyard—encourage gross motor skills, physical movement, and even social interaction if they are navigating it with a friend.

    Safety and supervision notes

    If you are creating physical mazes at home using household items, a few safety precautions are necessary:

    • Tripping hazards: If using pillows or cushions, ensure they are spread out enough so children don’t trip while running through the path.
    • Choking hazards: If using small objects like marbles or beads for a tabletop maze, always supervise younger children closely.
    • Visibility: Ensure that any “indoor” maze setup doesn’t block exits or create dark corners where a child might lose sight of an adult.

    Ultimately, the goal is to provide a safe space where they can explore, fail, and eventually succeed. The more they practice these small wins, the more confident they become when facing much larger, real-world problems.

    Are you looking to expand your child’s toolkit for logical thinking? Start small by adding a simple maze book to your next library trip or setting up a tape maze on your living room floor this weekend. It is a simple, low-cost way to foster a lifetime of curiosity and problem-solving.

    Our Top Picks

    Products we recommend:

    1. Problem Solving Skills for Children, Ages 5-12

    Problem Solving Skills for Children, Ages 5-12

    Problem Solving Skills for Children, Ages 5-12

    by BiggerBooks.com

    $13.66

    Check Price →

    2. Problem Solving Skills for Children, Ages 5-12

    Problem Solving Skills for Children, Ages 5-12

    Problem Solving Skills for Children, Ages 5-12

    by eCampus.com

    $13.94

    Check Price →

    3. Problem Solving Skills for Children, Ages 5-12

    Problem Solving Skills for Children, Ages 5-12

    Problem Solving Skills for Children, Ages 5-12

    by Knetbooks.com

    $12.43

    Check Price →

  • How Mazes Improve Problem-Solving Skills In Children

    How Mazes Improve Problem-Solving Skills In Children

    Remember those afternoons spent hunched over a piece of paper, frantically tracing lines with a crayon, only to hit a dead end and have to start all over again? For many of us, mazes were just a way to kill time on a long car ride. But for a child, that simple act of navigating a winding path is actually a high-level workout for the brain.

    Creative Problem-solving Puzzles Improve Hand-eye Coordination And

    As parents and educators, we are always looking for ways to help kids develop critical thinking. We often think we need expensive apps or complex logic kits, but sometimes the most effective learning tools are the ones that have been around for generations. Mazes offer a unique, low-pressure way to practice navigating obstacles, which is the very essence of problem-solving.

    The Brain Science Behind the Path

    When a child works through a maze, they aren’t just moving a pencil. They are engaging in a complex series of cognitive processes. Their eyes are scanning for patterns, their brains are predicting future turns, and their hands are executing precise movements. This process involves several key areas of development.

    First, there is the concept of spatial awareness. To solve a maze, a child must understand the relationship between the start point, the walls, and the exit. They have to visualize the path before they even move their pen. This mental mapping is a foundational skill for everything from reading maps to understanding geometry later in life.

    Second, mazes help build working memory. A child has to remember that a specific turn led to a dead end so they don’t repeat the mistake. This constant loop of “try, fail, remember, and adjust” is exactly how the brain builds stronger neural connections related to logic and reasoning.

    Developing Persistence and Resilience

    One of the biggest hurdles in modern childhood is the “instant gratification” loop. We live in a world of one-click solutions. Mazes, however, are inherently frustrating. You will hit dead ends. You will get lost. You might even want to crumple up the paper in frustration.

    < p>Learning to handle that frustration is a vital part of the problem-solving process. When a child encounters a dead end and decides to backtrack rather than quit, they are practicing resilience. They are learning that failure isn’t a signal to stop, but rather a piece of data telling them to try a different route. This mindset is incredibly educational because it translates directly to math problems, science experiments, and social conflicts.

    Age-Appropriate Maze Strategies

    Not all mazes are created equal. If you give a three-year-old a complex, multi-layered labyrinth, you’ll likely just end up with a frustrated toddler and a ruined drawing. To get the developmental benefits, you need to match the difficulty to their current stage of growth.

    Toddlers and Preschoolers: The Basics

    For the youngest learners, focus on very simple paths with wide corridors. The goal here isn’t complex logic, but rather fine motor control and basic directionality. Look for activities that are best for toddlers, such as “follow the line” games or mazes where they can use their fingers instead of a pencil.

    • Use thick, bold lines that are easy to see.
    • Keep the paths short and straight.
    • Incorporate sensory elements, like tracing paths in sand or salt.
    • Focus on “left” and “right” movements rather than complex junctions.

    Early Elementary: Building Logic

    Once children enter school age, you can introduce more twists and turns. This is the stage where they can start identifying “dead ends” as a concept. You can also introduce mazes with specific goals, like “help the bee find the flower,” which adds a layer of purpose to the task.

    • Introduce mazes with multiple branches.
    • Use mazes that require following a specific sequence of symbols.
    • Introduce “logic mazes” where they have to follow certain rules (e.g., “don’t pass the red gate”).

    Older Children: Advanced Strategy

    For older kids, mazes can become much more intricate. You can move into 3D mazes or even physical mazes built out of household items. At this level, the focus shifts toward strategic planning and long-term foresight.

    At this stage, you might try “pre-solving” strategies. Encourage them to use a finger to trace the path first, or even use a pencil to lightly mark potential routes before committing to a final line. This teaches them to plan their actions before executing them.

    Making it Budget Friendly and Fun

    You don’t need to spend a fortune on specialized workbooks to make this happen. Some of the best maze-solving experiences are completely budget friendly and can be created with items you already have in your kitchen or craft drawer.

    Try building a “floor maze” using painter’s tape on a carpet. This allows children to physically walk the path, using their entire bodies to handle the turns. It turns a sedentary activity into a physical one, which is great for kinesthetic learners.

    Another great idea is the “Marble Maze.” Use a shallow cardboard box lid, some straws, and some glue. Glue the straws down in a maze pattern and let your child roll a marble through the course. This adds a layer of physics and gravity to the problem-solving equation.

    A Note on Safety and Supervision

    While maze-solving is generally a safe, low-risk activity, there are a few practical things to keep in mind:

    • Choking Hazards: If you are creating marble mazes or using small objects like beads, always supervise younger children closely to prevent accidental ingestion.
    • Frustration Management: Watch for signs of extreme distress. If a child is getting too upset, it is okay to step in and “help” them find a way out. The goal is to build confidence, not to cause a meltdown.
    • Physical Space: If you are building large-scale tape mazes on the floor, ensure the area is clear of tripping hazards like heavy furniture or loose rugs.

    Summary of Developmental Benefits

    To wrap things up, let’s look at the quick wins you can expect when incorporating mazes into your child’s routine:

    1. Improved fine motor skills and hand-eye coordination.
    2. Enhanced spatial reasoning and mental mapping.
    3. Strengthened working memory and attention to detail.
    4. Development of persistence, patience, and grit.
    5. Better logical reasoning and strategic planning abilities.

    Next time you find yourself with a few spare minutes and a bored child, skip the mindless scrolling on a tablet. Grab a piece of paper, a pen, and a winding path. It might just be the mental workout they need to become the great problem-solvers of tomorrow.

    Want more practical tips for brain-boosting play? Sign up for our weekly newsletter to get creative activity ideas delivered straight to your inbox!

    Our Top Picks

    Products we recommend:

    1. Problem Solving Skills for Children, Ages 5-12

    Problem Solving Skills for Children, Ages 5-12

    Problem Solving Skills for Children, Ages 5-12

    by Knetbooks.com

    $12.43

    Check Price →

    2. Problem Solving Skills for Children, Ages 5-12

    Problem Solving Skills for Children, Ages 5-12

    Problem Solving Skills for Children, Ages 5-12

    by eCampus.com

    $13.94

    Check Price →

    3. Problem Solving Skills for Children, Ages 5-12

    Problem Solving Skills for Children, Ages 5-12

    Problem Solving Skills for Children, Ages 5-12

    by BiggerBooks.com

    $13.66

    Check Price →

  • Organizing Medical Appointments For Elderly Parents

    Organizing Medical Appointments For Elderly Parents

    It usually starts with a single missed pill or a forgotten follow-up. Suddenly, you realize that the person who used to take care of you is now the one who needs a bit of extra help navigating the healthcare system. Managing medical appointments for an aging parent can feel like a full-time job, especially when you’re balancing your own career, kids, and household responsibilities.

    Group Medical Appointments

    The weight of responsibility is heavy, but you don’t have to do it all by brute force. Instead of trying to remember every detail in your head, the goal is to build a system that reduces stress for both you and your parent. By setting up a predictable routine and centralizing information, you can ensure they get the care they need without feeling like they’ve lost their independence.

    Assess the current level of care needed

    Before you start booking appointments, take a moment to look at the big picture. Not every parent needs a full-time coordinator. Some might just need a little help with the logistics of transportation, while others might need you to sit in on every consultation to take notes.

    Ask yourself a few honest questions:

    • Can they communicate their symptoms clearly to a doctor?
    • Are they able to manage their own medication schedule?
    • Do they have reliable transportation to and from the clinic?
    • Do they remember the instructions given during the last visit?

    If they are still sharp but just struggling with the logistics, you can play a supporting role. If cognitive decline is a factor, your role shifts toward being an advocate and a primary information gatherer. Knowing where you stand helps prevent burnout later on.

    Create a centralized medical hub

    One of the biggest headaches in caregiving is the “information scavenger hunt.” You’re at the specialist’s office, and suddenly you can’t remember when the last blood test was done or what the primary doctor’s office number is. To stop this, you need a single source of truth.

    The physical folder method

    Don’t underestimate the power of a sturdy, brightly colored accordion folder. Keep physical copies of recent lab results, immunization records, and insurance cards here. This is especially helpful if you have a parent who prefers paper or if you need to hand something quickly to a nurse during an intake process.

    The digital backup

    While paper is great for the doctor’s office, a digital version is better for your daily life. Use a secure cloud storage folder (like Google Drive or Dropbox) to snap photos of medical documents. This way, if you are at work and your parent calls with a question, you can pull up their medication list from your phone in seconds.

    A shared digital calendar

    Stop relying on sticky notes. Use a shared digital calendar that both you (and any siblings) can access. When a new appointment is made, put it on the calendar immediately with the location, the doctor’s name, and the specific purpose of the visit. This prevents double-booking and ensures everyone in the care circle is on the same page.

    Mastering the art of the medical appointment

    Going to the doctor with an elderly parent is about more than just showing up on time. It is about being an active participant in the conversation. Doctors are often rushed, so you need to be prepared to make the most of those fifteen minutes.

    To make these visits productive, try following this pre-appointment checklist:

    1. Write down symptoms in advance: Don’t rely on memory. Note when symptoms started, what makes them worse, and how they affect daily life.
    2. Prepare a list of questions: Group them by priority. Start with the most pressing concerns so they don’t get cut off by the end of the session.
    3. Update the medication list: Include dosages, frequencies, and any new supplements or vitamins they’ve started taking.
    4. Review recent changes: Note any recent falls, changes in appetite, or sleep disturbances.

    During the appointment, your job is to be the scribe. Focus on capturing the “why” behind the doctor’s decisions. If they change a dosage, ask why. If they order a new test, ask what they are looking for. Taking these notes relieves the pressure on your parent to remember complex medical jargon.

    Managing the medication shuffle

    Medication management is often the most complex part of organizing care. A single error can lead to a hospital visit, so you need a system that is fail-proof. If your parent is managing multiple prescriptions, the margin for error is slim.

    Consider using a weekly pill organizer. It’s a classic tool for a reason—it provides a visual confirmation of whether a dose was taken. For more complex needs, there are automated pill dispensers that beep or rotate at specific times. These can be a lifesaver for parents who live alone or for caregivers who can’t be there 24/7.

    Additionally, keep a “Master Medication List” that is updated every single time a prescription changes. This list should include the drug name, the strength, the dose, and the reason for taking it. This is the first thing any emergency responder or new specialist will ask for.

    Building a support network

    You cannot be the only person responsible for this. Even if you are the primary caregiver, you need a “relief squad.” This might include siblings, adult children, or even professional home health aides. The key is to distribute the mental load.

    Try rotating responsibilities. Perhaps one sibling handles the insurance paperwork and billing, while another handles the physical transportation to appointments. If you are the one doing the heavy lifting, try to delegate the administrative tasks that don’t require physical presence. This prevents you from feeling isolated in the process.

    Lastly, don’t forget to communicate with the doctor’s office staff. Build a relationship with the nurses and the office manager. Often, they are the ones who can help you navigate scheduling conflicts or provide clarity on lab results before the doctor even calls you back.

    Organizing care for a parent is a marathon, not a sprint. It takes time to find the rhythm that works for your specific family dynamic. Start small, build your systems one piece at a time, and remember to give yourself some grace along the way.

    If you’re feeling overwhelmed by caregiving duties, start by creating that central medical folder today. Small steps lead to much more manageable days.

    Our Top Picks

    Products we recommend:

    1. Group Medical Appointments

    Group Medical Appointments

    Group Medical Appointments

    by BiggerBooks.com

    $186.01

    Check Price →

    2. Group Medical Appointments

    Group Medical Appointments

    Group Medical Appointments

    by Knetbooks.com

    $128.38

    Check Price →

    3. Group Medical Appointments

    Group Medical Appointments

    Group Medical Appointments

    by eCampus.com

    $189.81

    Check Price →

  • Printable Activity Pages For Road Trips With Kids

    Printable Activity Pages For Road Trips With Kids

    We have all been there. You are three hours into a six-hour drive, the snacks are dwindling, and the backseat has officially turned into a tiny, high-tension zone of boredom and whining. You look in the rearview mirror, and the eyes staring back at you are filled with pure, unadulterated restlessness. As much as we love the adventure of a family road trip, the “are we there yet?” loop can wear down even the most patient parent.

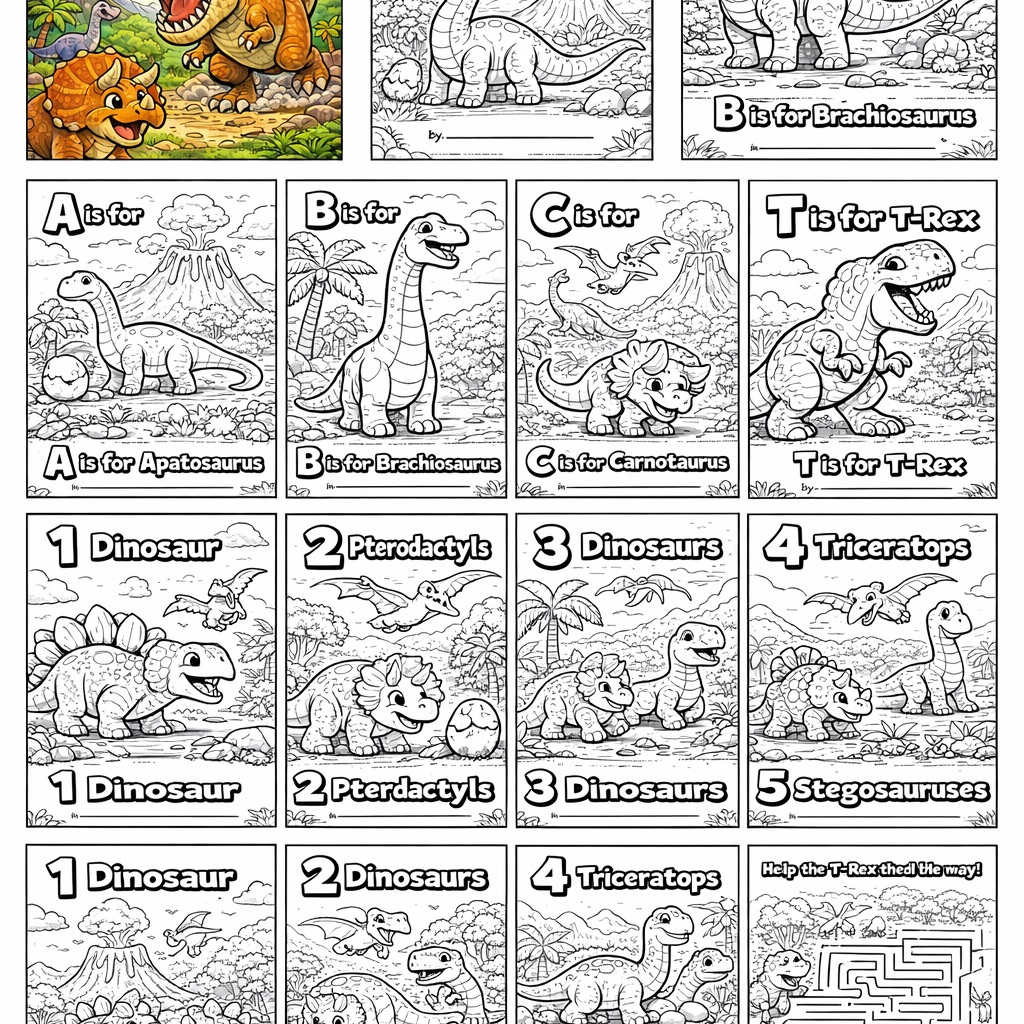
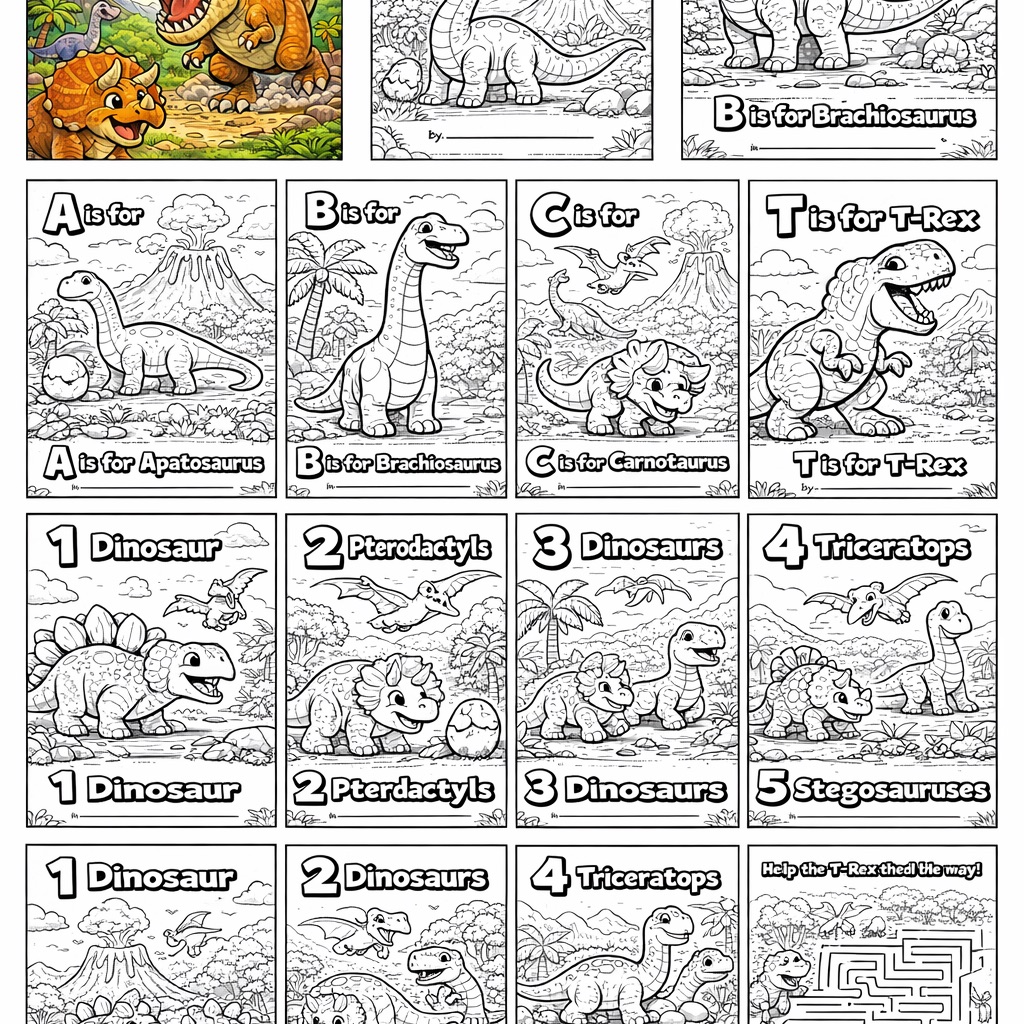
    Dinosaur Coloring Activity Pages - Black & White Printable Set

    While tablets and movies can provide temporary relief, they often lead to screen fatigue or the dreaded motion sickness. That is why I have become a huge advocate for physical, tactile engagement. Specifically, I am talking about printable activity pages. They are a budget friendly way to keep little hands busy and minds occupied without needing a bulky toy box or a heavy laptop.

    Why Paper and Pen are Secret Weapons for Long Drives

    You might wonder why we would go back to “old school” methods when high-tech gadgets are so readily available. The truth is, paper-based activities offer something a screen simply cannot. They encourage fine motor skills, focus, and a sense of accomplishment that a digital game lacks.

    When a child completes a word search or finishes a coloring page, they feel a tangible sense of pride. This type of engagement helps with cognitive development, particularly in areas like pattern recognition, literacy, and spatial awareness. Plus, from a practical standpoint, you don’t have to worry about dead batteries or finding a Wi-Fi signal in the middle of a national forest.

    The Developmental Perks of Offline Play

    • Fine Motor Skills: Holding a crayon, tracing lines, or coloring within boundaries strengthens the small muscles in the hands.
    • Cognitive Focus: Solving puzzles or mazes requires sustained attention, which helps build concentration muscles.
    • Language Literacy: Scavenger hunts and word searches introduce new vocabulary and spelling in a low-pressure way.

    Tailoring Activities to Different Age Groups

    Not all road trip boredom is created equal. A toddler’s needs are vastly different from those of a ten-year-old. If you try to give a preschooler a complex logic puzzle, you’ll likely just end up with a crumpled piece of paper and a frustrated child. The key is to match the difficulty to their developmental stage.

    Activities for the Little Ones

    When looking for materials that are best for toddlers, think about simplicity and sensory engagement. At this age, they aren’t quite ready for complex instructions, so focus on visual stimulation.

    • Large-Scale Coloring: Use thick lines and simple shapes like suns, cars, or animals.
    • Dot-to-Dot: Very simple versions (1 to 10) help them practice number sequencing.
    • Sticker Mats: While not strictly “printable,” you can print coloring pages that serve as a base for stickers, which is a huge hit for tiny hands.

    Engaging School-Aged Kids

    Once kids enter elementary school, they crave a challenge. They want something that feels like a “mission.” This is where you can introduce more intricate layouts.

    • Road Trip Scavenger Hunts: Create a checklist of things to spot out the window, like a red truck, a cow, or a wind turbine.
    • <|turn>

    • Mazes and Logic Puzzles: These keep them deeply focused and can occupy them for much longer stretches of time.
    • Mad Libs Style Stories: Print out templates where they can fill in nouns, verbs, and adjectives to create silly stories.

    Keeping Tweens and Teens Interested

    It is much harder to impress a teenager with a coloring book. For this group, you need to pivot toward creativity and observation. Think about “journaling” prompts or complex “I Spy” challenges that require them to look closely at the landscape. Even a simple “Design your own sneaker” printable can be surprisingly engaging for a creative teen.

    Safety and Practicality: The Parent’s Checklist

    Before you start printing, let’s talk about the logistics of the car environment. We want the kids to be occupied, but we don’t want the car to become a chaotic mess of loose papers and rolling crayons.

    First, consider the indoor vs outdoor nature of your activities. While the “indoor” activity is happening inside the car, the “outdoor” element comes from the scenery they are observing. Always pair a seated activity (like coloring) with an observational activity (like the scavenger hunt) to keep them looking at the world around them.

    Safety is also a major factor. Avoid small, detachable parts like tiny beads or small erasers that could become choking hazards for younger siblings. Stick to crayons, washable markers, or colored pencils. Also, I highly recommend using a small, clip-on lap desk or even a sturdy cookie sheet to create a flat, stable surface for their work.

    Pro-Tips for a Mess-Free Journey

    1. The Clipboard Method: Give each child their own clipboard. It provides a hard surface and keeps all papers together.
    2. Pre-Packaged Kits: Instead of handing out one sheet at a time, prepare “activity envelopes” for each child. This prevents them from seeing all the “fun” at once and makes the excitement last longer.
    3. Ziploc Organizing: Keep crayons and markers in a large Ziploc bag to prevent them from rolling under the seats.

    Where to Find Great Printables

    The great news is that you don’t need to be an artist to create these. There are countless resources online where you can find high-quality, ready-to-print pages. Many educators and parents share their creations on platforms like Etsy or Pinterest. You can often find “mega-bundles” that include everything from alphabet tracing to complex word searches, making it a very budget friendly option compared to buying expensive activity books.

    If you are feeling particularly creative, you can even use simple design tools to make custom scavenger hunts. For example, if you know you are driving through the Midwest, you can specifically include “cornfields” or “tractors” on your custom list. This personalized touch makes the activity feel much more special to the kids.

    Final Thoughts on Road Trip Success

    Ultimately, the goal of these activities isn’t just to keep the kids quiet; it’s to transform a long, potentially stressful drive into a period of discovery and play. By providing them with the right tools, you are helping them engage with the journey rather than just enduring it.

    So, before you pack the snacks and check the tire pressure, take an hour to print out some fresh, exciting pages. Your future, exhausted self will thank you when you reach your destination with everyone still smiling (and relatively peaceful).

    Ready to make your next trip unforgettable? Start browsing for your favorite activity templates today and turn that long highway stretch into a playground on wheels!

    Our Top Picks

    Products we recommend:

    1. Dinosaur Coloring Activity Pages – Black & White Printable Set

    Dinosaur Coloring Activity Pages - Black & White Printable Set

    Dinosaur Coloring Activity Pages – Black & White Printable Set

    by Poshmark

    $10.00

    Check Price →

    2. Activity Books for Kids, Writing Exercises for Kids, Learning Materials for Homeschool Teaching, Travel, Road Trips, Airplane

    Activity Books for Kids, Writing Exercises for Kids, Learning Materials for Homeschool Teaching, Travel, Road Trips, Airplane

    Activity Books for Kids, Writing Exercises for Kids, Learning Materials for Homeschool Teaching, Travel, Road Trips, Airplane

    by OnBuy.com

    $40.60

    Check Price →

    3. Older Kids Activity Pages

    Older Kids Activity Pages

    Older Kids Activity Pages

    by BiggerBooks.com

    $5.14

    Check Price →

  • Organizing Medical Appointments For Elderly Parents

    Organizing Medical Appointments For Elderly Parents

    It usually starts with a single, frantic phone call. Maybe your mom mentions a new pain in her hip, or your dad forgets that he was supposed to see his cardiologist last Tuesday. Suddenly, you aren’t just a son or daughter anymore; you are a part-time medical coordinator, a logistics expert, and a professional note-taker. It is a heavy transition that catches most of us off guard.

    Caring for Elderly Parents

    Managing healthcare for an aging parent is a massive undertaking. Between navigating insurance paperwork, tracking medication changes, and coordinating multiple specialists, the mental load can feel overwhelming. However, you don’t have to wing it. With a bit of structure and the right systems in place, you can move from a state of constant crisis management to a much more stable rhythm of care.

    Building a Centralized Information Hub

    The biggest mistake most caregivers make is letting important information live in scattered places. Some notes are on a sticky note in the kitchen, some are in a random email, and some are buried in a text thread. When a doctor asks, “When did this symptom start?” you need an answer that is instantly accessible.

    Start by creating a single “Source of Truth.” This could be a physical binder or a digital folder. If your parent is still relatively independent, a physical binder kept in a visible spot in their home is often the most reliable method. If you are managing things remotely, a shared digital space works better.

    What to include in a medical binder

    • A master list of all current medications, including dosages and frequencies.
    • Contact information for every specialist, primary care physician, and pharmacy.
    • Copies of recent lab results, X-rays, or MRI reports.
    • A summary of known allergies and past surgical history.
    • Insurance cards and copies of the most recent Explanation of Benefits (EOB) statements.

    Having this information in one spot prevents that panicked feeling when you’s sitting in a waiting room and realize you can’t remember the name of the specialist who performed a procedure two years ago.

    Mastering the Appointment Calendar

    Scheduling is about more than just marking a date on a calendar; it is about managing the logistics surrounding that date. You have to account for travel time, potential delays, and the “aftermath” of the appointment, such as picking up new prescriptions or scheduling follow-up tests.

    Use a shared digital calendar, like Google Calendar, if you are coordinating with siblings or other family members. This allows everyone to see updates in real-time. When you add an appointment, don’t just put the time. Include the doctor’s address, the specific suite number, and any preparation instructions, such as “must fast for 12 hours.”

    Try to group appointments together when possible. If your parent has to visit a specialist across town, see if there are other routine check-ups or physical therapy sessions that can be scheduled on the same day. This reduces the physical toll of travel and makes the logistics much more manageable for you.

    Preparing for the Visit: The Pre-Appointment Routine

    The work actually begins a few days before the appointment happens. One of the most helpful things you can do is sit down with your parent and review their recent health status. Are they experiencing new dizziness? Has their appetite changed? Have they had any falls?

    Write down these observations in a dedicated “Questions for the Doctor” section of your binder. It is very easy to get flustered once you are actually in the exam room. Having a written list ensures that you don’t forget the most critical concerns. I recommend preparing this list at least 48 hours in advance so you have time to process any new symptoms that might have surfaced.

    The “Three Question” Rule

    Doctors are often rushed. To make the most of your limited time, try to narrow your focus to three primary concerns. This prevents the appointment from feeling like a disorganized list of grievances and allows the physician to provide clear, actionable answers.

    Navigating the Exam Room Effectively

    Walking into a medical appointment can be intimidating, especially if you are trying to advocate for someone else. If your parent is able, let them lead the conversation. This preserves their autonomy and dignity. However, your role is to be the “safety net” that catches the details they might miss.

    During the consultation, take active notes. Don’t rely on your memory. If the doctor mentions a change in medication, write down exactly how the transition should happen. If they suggest a new test, ask what the next steps are if the results come back inconclusive.

    One trick that helps a lot is to ask the doctor to repeat the plan. You can say, “Just so I can make sure I’ve got this right for my notes, we are increasing the dosage of X and scheduling a follow-up in three weeks, correct?” This simple step prevents massive misunderstandings that could lead to medication errors later.

    Post-Appointment Follow-Up and Logistics

    The appointment isn’t over when you walk out the clinic doors. The real work happens in the hours following the visit. This is when the “logistics loop” needs to be closed.

    First, update the medication list in your central hub. If a dosage changed, make sure the new instructions are reflected everywhere—in the binder, in the pharmacy instructions, and in any pill organizers. Second, check the pharmacy. If a new prescription was written, call the pharmacy or check the online portal to ensure it is ready for pickup before you head home.

    Finally, communicate the updates to the rest of the care team. If you have siblings helping with care, send a quick summary email or text. A simple message like, “Dr. Smith adjusted Mom’s blood pressure meds; she needs to take 10mg instead of 5mg starting tomorrow,” keeps everyone on the same page and prevents dangerous errors.

    Managing a parent’s health is a marathon, not a sprint. It requires patience, organization, and a willingness to adapt as their needs change. By implementing these systems now, you are building a foundation that will help you stay calm and effective, no matter what challenges arise.

    If you found these tips helpful, consider subscribing to our newsletter for more practical advice on navigating the complexities of eldercare and family caregiving.

    Our Top Picks

    Products we recommend:

    1. Group Medical Appointments

    Group Medical Appointments

    Group Medical Appointments

    by BiggerBooks.com

    $186.01

    Check Price →

    2. Group Medical Appointments

    Group Medical Appointments

    Group Medical Appointments

    by eCampus.com

    $189.81

    Check Price →

    3. Group Medical Appointments

    Group Medical Appointments

    Group Medical Appointments

    by Knetbooks.com

    $128.38

    Check Price →

  • Memory Care Journal Ideas For Alzheimers Caregivers

    Memory Care Journal Ideas For Alzheimers Caregivers

    If you are reading this, you likely know the heavy, often overwhelming feeling of trying to keep track of a million moving parts. Between managing medication schedules, tracking sudden changes in mood, and trying to remember the last time your loved one had a good night’s sleep, your brain probably feels like a browser with fifty tabs open—and half of them are frozen.

    A Journal for Family Caregivers

    When a family member receives an Alzheimer’s or dementia diagnosis, the sheer volume of information can feel paralyzing. You aren’t just a family member anymore; you are a researcher, a nurse, a nutritionist, and a historian. This is where a memory care journal becomes your most reliable companion. It isn’t just a notebook to doodle in; it is a vital tool for tracking symptoms, communicating with doctors, and preserving the personhood of your loved one through the fog of memory loss.

    Why a dedicated journal is a lifeline for caregivers

    The primary struggle with memory care is the unpredictability of symptoms. One day, your spouse might be perfectly lucid; the next, they may struggle to recognize familiar faces. Trying to recall these specific fluctuations during a frantic 15-minute doctor’s appointment is nearly impossible. A journal provides an objective record that removes the guesswork.

    Beyond medical tracking, journaling serves a psychological purpose for you. Caregiving for someone with Alzheimer’s is an emotional marathon. Writing down your frustrations, your small wins, and even your grief can act as a pressure valve. It gives you a place to put the heavy thoughts so you don’t have to carry them around in your head all day.

    Practical ways to use a journal for medical tracking

    The most critical use of a journal is documenting the clinical side of care. When you sit down with a neurologist, you want to present facts, not just feelings. Use your journal to create a clear picture of the disease’s progression.

    Tracking medication and side effects

    New medications can cause unexpected reactions, from increased confusion to physical tremors. Keep a dedicated section for every new prescription. Note the date it started, the dosage, and any observable changes in behavior or physical health. This data is invaluable for doctors trying to fine-tune a treatment plan.

    Monitoring behavioral shifts and triggers

    Dementia often brings about “sundowning” or increased agitation in the late afternoon. Instead of just noting that “they were upset,” try to look for patterns. Use your journal to record:

    • Time of day when agitation occurs.
    • ‘ Environmental factors (loud noises, bright lights, or crowded rooms).

    • Dietary links (did the agitation happen after a high-sugar snack?).
    • Sleep patterns and how they correlate with daytime confusion.

    A log for doctor visits and instructions

    Never rely on your memory to capture everything a specialist says. Use your journal to jot down questions before the appointment and record the answers during the visit. This prevents that “wait, what did the doctor say about the dosage?” moment when you get home.

    Creative journaling ideas for preserving memories

    While the medical side is essential, the emotional side of the journal is where you can honor the person your loved one used to be. As the disease progresses, the “person” often feels like it is slipping away. A legacy-focused journal helps you hold onto the essence of who they are.

    The “Small Joys” log

    In the middle of the hard days, it is easy to forget the good ones. Create a page specifically for the tiny, beautiful moments. Perhaps they smiled at a certain song, or they enjoyed the taste of a specific fruit today. These entries are incredibly comforting to read during much more difficult seasons of caregiving.

    A sensory memory book

    Memory care is deeply tied to the senses. You can use your journal to document what brings comfort. List favorite scents (like lavender or peppermint), certain textures (a soft flannel shirt), or familiar sounds (classical music or bird songs). This can serve as a guide for you when you are trying to soothe them during a period of distress.

    Capturing stories before they fade

    If your loved one still has periods of lucidity, use your journal to record snippets of their history. Ask simple, open-ended questions about their childhood, their first job, or their favorite travel destinations. Even if they cannot participate in the writing, documenting these stories ensures their legacy remains intact.

    Organizing your journal for maximum efficiency

    A disorganized journal can become just another source of stress. To make this tool work for you, you need a system. You don’t need an expensive planner; a simple three-ring binder or a sturdy notebook works perfectly.

    Consider using tabbed dividers to separate your notes into categories. You might have one section for “Daily Care Logs,” one for “Doctor Notes,” and one for “Personal Reflections.” This allows you to flip directly to the information you need without hunting through pages of scribbled notes.

    Another helpful tip is to use a color-coded system. For example, use a red pen for urgent medical concerns, blue for medication changes, and green for positive observations. This visual shorthand makes it much easier to scan your notes quickly when you are in a hurry.

    Self-care: The hidden purpose of your journal

    Finally, please remember that the journal is for you, too. Caregiver burnout is a very real threat to both your health and the quality of care you can provide. Your journal can be a space for honest self-reflection. It is a place to admit that you are tired, that you are angry, or that you are scared.

    Writing these feelings down can help you process them. It transforms an amorphous cloud of anxiety into concrete words on a page. By acknowledging your struggles in writing, you are taking the first step toward managing them. You are documenting your own journey through one of life’s most difficult transitions.

    If you found these ideas helpful, consider starting your journal today. Even if you only write one sentence about how the day went, you are building a foundation of organization and peace that will serve you and your loved one for years to come.

    Are you looking for more resources on navigating the complexities of Alzheimer’s care? Subscribe to our newsletter for weekly tips on caregiving, organization, and emotional support.

    Our Top Picks

    Products we recommend:

    1. Self-Care for Caregivers

    Self-Care for Caregivers

    Self-Care for Caregivers

    by BiggerBooks.com

    $7.54

    Check Price →

    2. Self-Care for Caregivers

    Self-Care for Caregivers

    Self-Care for Caregivers

    by eCampus.com

    $7.32

    Check Price →

    3. Self-Care for Caregivers

    Self-Care for Caregivers

    Self-Care for Caregivers

    by Knetbooks.com

    $10.00

    Check Price →